Introduction to UniDAC: Revolutionizing Cross-Platform SQL Server Connectivity
In the realm of database management and application development, the ability to create versatile, cross-platform solutions is increasingly vital. This video tutorial addresses this need by demonstrating the process of developing a cross-platform database application specifically for SQL Server, utilizing the powerful Universal Data Access Components (UniDAC). UniDAC stands out for its unique ability to offer a unified approach to database connectivity, simplifying the development process across various operating systems. The goal is to showcase how developers can efficiently build an application that seamlessly operates on Windows, MacOS, iOS, and Android, all while maintaining a consistent connection to SQL Server. This approach not only enhances the application’s accessibility across different platforms but also ensures a streamlined and efficient development process, making it an invaluable resource for developers looking to expand their database application’s reach and functionality.
Setting Up the Application: A Detailed Guide
Creating a cross-platform database application for SQL Server using UniDAC involves several critical steps. This guide will walk you through the initial phase of setting up the application, focusing on adding and configuring the UniConnection and SQL Server data provider, and then establishing a connection to SQL Server.
Adding UniConnection and SQL Server Data Provider to the Form
- Start Your IDE:Open your preferred Integrated Development Environment (IDE) where you plan to develop your application.
- Create a New Project:Initiate a new project, selecting the appropriate project type based on your target platform (e.g., Windows, MacOS, iOS, Android).
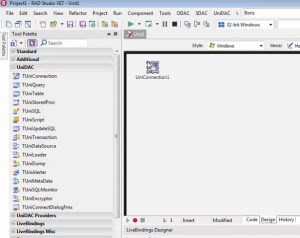
- Access the Tool Palette:In your IDE, locate the Tool Palette. This is typically found on the side panel.
- Find UniConnection:In the Tool Palette, search for ‘UniConnection’. This is the component that will manage your database connection.
- Drag UniConnection to Form:Click and drag the UniConnection component onto your form. This action places the component onto your application’s user interface.
- Add SQL Server Data Provider:Similarly, find the SQL Server data provider component in the Tool Palette. Drag and drop this onto your form as well. This component is essential for interfacing specifically with SQL Server.
Configuring the Data Provider in UniConnection
- Select UniConnection Component:Click on the UniConnection component you just added to your form.
- Open Property Editor:In the properties window (usually on the right side in most IDEs), find the property for selecting the data provider.
- Choose SQL Server Data Provider:From the dropdown in the property editor, select the SQL Server data provider. This action links UniConnection to SQL Server.
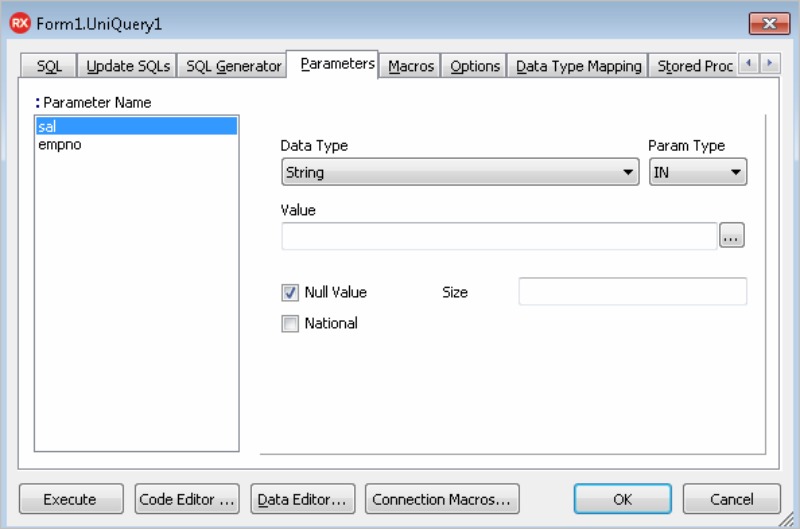
- Configure Connection Properties:Still in the properties window, you’ll need to set the following:
- Server:Enter the name or IP address of your SQL Server instance.
- Database:Specify the database name you wish to connect to.
- UserName:Input the username for the SQL Server authentication.
- Password:Enter the corresponding password for the SQL Server account.

Ensure that these details are entered correctly, as they are crucial for establishing a successful connection.
Opening a Connection to SQL Server
- Test the Connection:Before proceeding, it’s crucial to test the connection. Look for an option to test the connection in the UniConnection property editor or toolbar. This will verify if the details you’ve entered are correct and the server is reachable.
- Write Connection Code:In your form’s code, write the necessary code to open the connection. This typically involves calling the Open method on the UniConnection object. For example, UniConnection1.Open();.
- Error Handling:Implement error handling to catch any issues during the connection process. This can be done using try-catch blocks in your code.
- Run the Application:Execute your application. If everything is set up correctly, UniConnection will establish a connection to the SQL Server using the provided details.
By following these steps, you’ve successfully set up the initial stage of your cross-platform database application, establishing a connection to SQL Server using UniDAC. This foundation is crucial for the further development and functionality of your application.
Building the Query: A Detailed Guide
After setting up the application and establishing a connection to SQL Server using UniDAC, the next critical step is to build the query. This involves adding the UniQuery component to your form and inputting the SQL query into UniQuery. Here’s a detailed guide on how to accomplish this:
- Adding the UniQuery Component
- Open Your Project:Start by opening the project where you have already set up UniConnection.
- Locate UniQuery in the Tool Palette:In your IDE, go back to the tool palette. Here, you will find various components for database operations.
- Drag and Drop UniQuery:Find the ‘UniQuery’ component. Click on it, drag it, and then drop it onto your form. UniQuery is a versatile component that allows you to execute SQL queries and handle the results.
- Configuring UniQuery
- Link UniQuery to UniConnection:Before you can input an SQL query, UniQuery needs to be linked to UniConnection. Select the UniQuery component on your form, and in the properties window, set the ‘Connection’ property to your UniConnection component. This step ensures that UniQuery uses the established database connection for its operations.
- Prepare for SQL Input:Ensure that the UniQuery component is still selected. Look for the property where you can input the SQL query. This is typically labeled as ‘SQL’, ‘Query’, ‘CommandText’, or something similar.
- Inputting the SQL Query into UniQuery
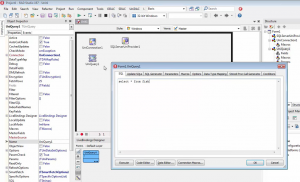
- Access the SQL Property Editor:Double-click on the SQL property or use the designated button (often a small button with an ellipsis ‘…’) to open the SQL property editor. This is where you will input your SQL query.
- Write Your SQL Query:In the SQL property editor, write the SQL query you wish to execute. For example, if you want to retrieve data from a table named ‘Customers’, your SQL query might look like: SELECT * FROM Customers;.
- Validate SQL Syntax:Ensure that your SQL query follows the correct syntax for SQL Server. This is crucial for the query to execute successfully.
- Save the Query:After writing and reviewing your SQL query, save it. This is typically done by closing the SQL property editor, which automatically saves the query in most IDEs.
- Testing the Query
- Run the Application:To test if your query works as expected, run your application.
- Execute the Query:Depending on your application’s design, you might have a button to execute the query or it might execute automatically on form load. Ensure that the query is being executed and observe the results.
- Debug if Necessary:If the query does not execute as expected, use your IDE’s debugging tools to troubleshoot. Common issues might include syntax errors in the SQL query or connection issues with the database.
By following these steps, you have successfully added and configured the UniQuery component in your application and inputted an SQL query. This is a fundamental part of interacting with your SQL Server database, allowing you to retrieve, update, or manipulate data as per your application’s requirements.
Conclusion
The tutorial we’ve explored underscores the remarkable simplicity and efficiency in creating cross-platform database applications for SQL Server, leveraging the robust capabilities of components like UniDAC. This approach not only streamlines the development process but also ensures seamless functionality across various platforms, including Windows, MacOS, iOS, and Android. The demonstrated methodology, from setting up connections to implementing data binding, highlights the user-friendly nature of these tools, making sophisticated database applications more accessible than ever.
We encourage developers to apply these insights to other database systems as well, exploring the vast potential of cross-platform application development. For those eager to dive deeper or expand their expertise into other databases, our website serves as a rich resource. Here, you’ll find further information, advanced tutorials, and a community of experts ready to support your development journey. Visit us to explore more and take your database application skills to new heights.